Going to Market with Windows Phone 7
November 7, 2010
New York, N.Y.
I'm basically an API and frameworks guy. My reputation in the Windows programming community is founded almost entirely on my ability to illustrate basic programming techniques with tiny (but otherwise useless) programs. That's pretty much the limits of my expertise. I don't know the first thing about marketing software, and even big-boy terms like "application architecture" give me the willies.
But of course, the rules have now changed. It doesn't make any sense for me to write an entire book about Windows Phone 7 programming and not take the final step in publishing an application to the marketplace. One of the most enticing aspects of the phone for small developers is the ability to get an application in front of people without a huge amount of expenditures and marketing acumen. It's a fairly level playing field, and individual developers have the potential of mixing skill and luck to create a popular application that might actually... yes, earn a few bucks.
This blog entry describes how I took one of the programs in my book Programming Windows Phone 7 and got it into the marketplace.
Getting an Account
The older Windows Phone 7 portal at http://developer.windowsphone.com is no more. That URI is now redirected to the new App Hub site at http://create.msdn.com. If you log into this site with a Windows Live ID and you haven't yet signed up for the Windows Phone 7 marketplace, you will be prompted to create an account. A membership in the App Hub costs $99 a year.
This membership is necessary not only for submitting programs to the marketplace, but is also important for developing those applications in the first place. You can certainly do a considerable amount of development using the Windows Phone 7 emulator but you'll eventually want to test those programs on a real phone. A membership in the App Hub is required for unlocking up to three phones so you can deploy programs to them from Visual Studio.
After you've created an App Hub membership, that membership is associated with your Windows LIve ID, and that ID is all you need to access the App Hub. In particular, the "my dashboard" menu item gives you access to your membership profile and information about programs that you've submitted to the market.
Doing the Research
The Design Resources for Windows Phone page in the MSDN documentation has several links to important documents regarding the phone.
In particular, the UI Design and Interaction Guide for Windows Phone 7 (version 2.0) is the basic description of the user interface for Windows Phone 7 written for both designers and developers. Why somebody chose to make this document an 11" by 17" PDF, I have no idea. Even if you have a way to print it out, it's awkward to handle, but not quite as awkward as reading it on the desktop. Nevertheless, there's lots of basic stuff in there and you'll want to give it a close read.
For the specific job of submitting an application to the marketplace, you'll want to give an even closer read to the Windows Phone 7 Application Certification Requirements. This document describes what you need to submit an application to the marketplace, the type of content that might be rejected, and also some features you might need to add to your program, such as a dialog requesting permission for the program to determine your location.
Preparing the Program
For my first marketplace submission, I decided upon an XNA program called SpinPaint from Chapter 23 of my book. This program displays a spinning disk on which you can use your fingers to paint patterns. Whatever your finger paints directly on this disk is repeated in mirror images in the disk's four quadrants. I chose this program because it's very much suited to the phone, and people seem to have fun with it despite its relative simplicity. Yet, the program is not trivial, and requires access to the phone's photo library for saving your "artwork."
Although I didn't intend to add any additional features to the program, I decided that it needed what we once called an "about box." I added a button to the main screen that displays a game component that includes the program's name, version number, and the cover of my book. Pressing that cover invokes the phone-specific WebBrowserTask to take you to the page on my web site to download the book. (Did you hear that the book is a free download?) If you have the Adobe Reader program installed on the phone, you can even read the PDF of the book.
I also re-thought my tombstoning logic. The version of the program shown in my book saves the contents of the spinning disk to the regular State dictionary during tombstoning. But I didn't like the idea that the artwork could disappear while the program was tombstoned, and I was also concerned that the program had no way for the user to save some artwork temporarily and return to it. So instead of using the normal State dictionary for tombstoning, I used isolated storage instead.
This is not exactly the recommended behavior. Invoking the program from the Start screen is supposed to create what appears to be a new instance. However, given that the user can simply erase the disk by pressing the "clear" button, I felt this behavior was proper in this case.
You'll definitely want to test your programs under different color schemes. Go to the Settings screen on the phone or phone emulator, and then "theme." You can choose either the default dark (white-on-black) theme or the light (black-on-white) theme with an accent color.
Because SpinPaint was an XNA program, I didn't think I had to worry about themes because I was specifying all my colors explicitly. Then I discovered Michael B. McLaughlin's blog entry on Using WP7 Themes in Your XNA Game so I decided to use theme colors for my buttons and the entire About component.
I also edited two of the files in the Properties directory. In the WMAppManifest.xml file, I set the Title attribute in the App tag to the name "Spin Paint" with an embedded blank. I also made sure that the Genre was "Apps.Normal" because I didn't want the program to end up in the game hub on the phone. In the AssemblyInfo.cs file, I made the AssemblyTitle also with an embedded blank ("Spin Paint") and I put in some copyright information.
You don't need to mess around with the Capabilities list in the WMAppManifest.xml file; this is handled for you when the program is analyzed during the submission process. You also don't need to sign the app; this too is handled for you.
However, you'll want to build the project for Release mode.
The Five (yes, Five) Icons
When Visual Studio creates a new Windows Phone 7 XNA project, it includes two PNG files that get embedded into the XAP file: Background.png and GameThumbnail.png. (In a Silverlight project, the second one is called ApplicationIcon.png.) These are icon files to display the program on the phone. ApplicationIcon.png and GameThumbnail.png are 62 pixels square and are intended for the application list on the right half of the Start screen; Background.png is 173 pixels square and is used in the game hub, or when you pin a program to the Start screen.
In addition, the "Windows Phone 7 Application Certification Requirements" document describes three additional PNG files for displaying your program in the marketplace. You'll be uploading these files when you submit your program to the market. These file don't require specific names but they do need to be particular sizes:
-
Small phone tile: 99 pixels square
-
Large phone tile: 173 pixels square
-
Large PC (ie, Zune) tile: 200 pixels square
The two icons and the three tiles should have a similar appearance, and obviously you'll make your job easier by creating all five files at the same time. But here's the catch: The three tiles you'll need for uploading the application must not use any transparency. For the ApplicationIcon.png or GameThumbnail.png file, the use of transparency is up to you, but you'll want to test how the icon looks under both light and dark color schemes.
The problematic one is the Background.png file. This is the icon the phone uses when the user pins the program to the Start screen. (You can do this on the phone or in the emulator by pressing the listed program until a menu pops up and then picking "pin to start".) The Start screen displays this icon with an overlay title. You'll want that title to be visible, and that might not be the case if the image occupies the whole square. You might want to create a 173-pixel square transparent PNG file and then put a smaller version of the icon (for example, 120-pixels square) towards the top of that area so the title is unobscured.
For example, here's the 173-pixel square file used for displaying the program in the marketplace:

But here's the 173-pixel square file named Background.png (shown with a border so you can see that a good chunk is transparent):

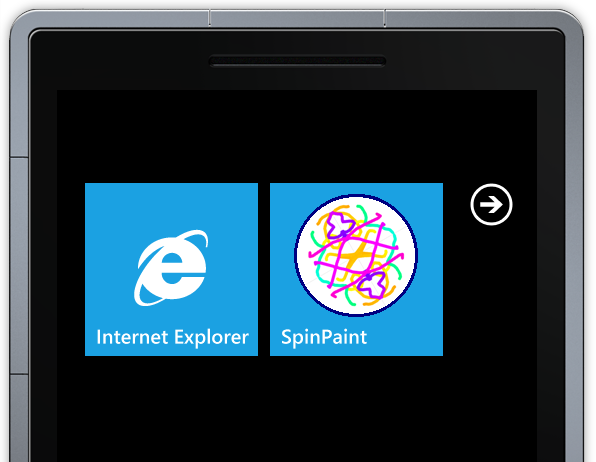
And here it is pinned to the Start screen of the emulator:
Whatever you choose to do, be sure to try it out with different color schemes and see what works the best.
If you're using a Panorama control, you have the option of uploading a 1000 × 800 pixel PNG file with the background you're using.
You'll also need from one to 8 screenshots, either 480 × 800 or 800 × 480 pixels depending on the orientation of your program. It's certainly easiest to do these screenshots using the emulator, and just crop to the size of the screen.
For some programs, you'll want to create the screenshot directly from the phone, and this can be difficult. You'll need to add some code to the program just for this purpose. For a Silverlight program, draw the visual tree on a WriteableBitmap and save it to the photo library. (If you use an ApplicationBar, you'll discover that this isn't part of the visual tree and you'll need to add it to the image later.) In an XNA program, create a RenderTarget2D the size of the screen, set it into the GraphicsDevice object, and then make the same calls you make in the Draw override. Again, save the result to the photo library. The next time you sync the phone with the PC, the image will be transferred to a local directory.
Submitting the Program
When you have everything ready, it's time to take the plunge. Go onto the App Hub and click the box that says "Submit for Windows Phone." You'll have five screens to fill out:
In the first screen, you'll need to enter the name of the program, which should be consistent with the name in the WMAppManifest.xml and AssemblyInfo.cs, in my case, "Spin Paint" with an embedded blank. This is also where you specify the local filename of the XAP file and upload that file. You'll find the XAP file in the bin/Release directory of the Silverlight project, or the bin/WindowsPhone/Release directory of an XNA project.
In the second screen, you'll need to pick a category and possibly a sub-category for the program. These are the same categories and sub-categories the user sees when browsing the marketplace. I chose "entertainment" for Spin Paint. You'll also need a description for the program. Usually descriptions are more extensive than the one I supplied: "Use your fingers to paint kaleidoscopic patterns on a spinning disk." I also supplied three keywords: paint, draw, and kaleidoscope separated by commas.
In the third screen you upload all the "artwork," which are the three PNG files I listed above that are used for displaying the program in the marketplace, and the optional panorama background, and at least one screenshot.
In the fourth screen, you select how much you want to charge for the proram. I chose $0.00. (The next program I submit to the market will have a non-zero price so I see how that works.)
In the fifth screen, you confirm everything and finish up. The whole process of submitting the application took me about 20 minutes, but it could have been much longer if I wasn't prepared with everything I needed.
Then You Wait
The program you submit undergoes a process of certification to test what resources it needs and to determine that it won't blow up the phone or corrupt your morals.
After submitting my application at about 3:00 PM on Thursday, November 4, my main dashboard screen indicated that my account information was incomplete. My email address had never been verified and my bank information hadn't been verified. I quickly went to those two screens, and soon received an email for confirming my email address.
About 12 hours later — while I was sleeping — I received an email that read (in part) "Congratulations Charles Petzold of Charles Petzold!" (That's me and my "company.") The email continued: "Spin Paint has successfully passed certification for Windows Phone Marketplace! You may now publish your application to the Marketplace."
When submitting the program I had indicated that I wanted it automatically published, and indeed when I went to my dashboard, it said that the status of Spin Paint was "Published to Marketplace." However, it also said "Payment information incomplete" and "Enter your bank and tax information," but I could see nothing wrong with that screen.
Alas, when I went looking for Spin Paint in the actual Windows Phone 7 Marketplace, I couldn't find it. Over the next several days I checked fairly regularly — certainly not more frequently than every 15 minutes or so — and it was confusing to me whether it was held up because the bank and tax information wasn't verified, and how could that matter for a free program?
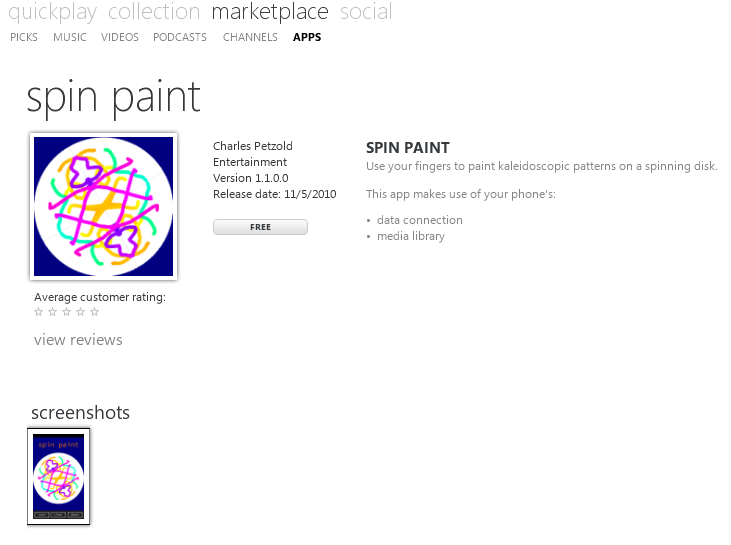
At last, this morning, it was there! Here's how it looks in the Zune desktop program:
So, approximately 60 hours after submitting the program, my career advanced form pedagogy to publishing, as I went from being the writer of glorified hello-world programs to a mogul of my own software house.
Can true fame and fortune be far behind?
Programming Windows Phone 7
Free thousand-page ebook now available!